Time line mapping and sequencing of events
It is important in every case to clearly describe the sequence of events that took place, the time that lapsed between the events, and the total number of events (such as the number of gunshots or the number of threatening gestures made by a suspect). To do this in a clear and concise way, so that the jury stays receptive and focused, a few steps are required:
- Initially, we must have a discussion with the client to learn their specific audio or video enhancement needs and goals that will allow our forensic digital media experts to focus on the exact sections of evidence that are most relevant to their case.
- We then filter & forensically digitally enhance the audio or video evidence, sharpening any details that we can.
- When the evidence enhancements are finished we listen and view — sometimes dozens and sometimes hundreds of times — to analyze an event for the clearest picture possible of what transpired.
- Next, we analyze the fine details, developing a specific breakdown of the incident.
- Lastly, after analyzing the audio or video evidence, the most clear and simple exhibits are prepared by the forensic experts to explain the results to a judge, jury, and mediation administrators. Below is an example of a timeline created by one of our forensic experts and used to explain the sequence and timing of events in a surveillance video.
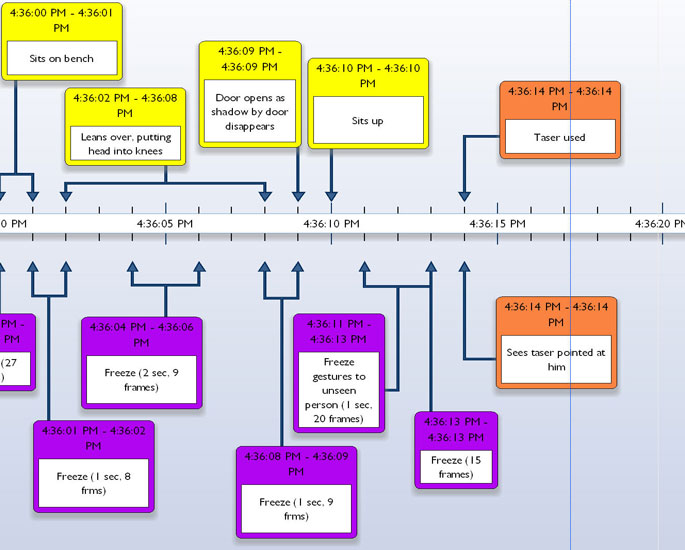
Timelines can help a jury understand the flow and sequence of events.